
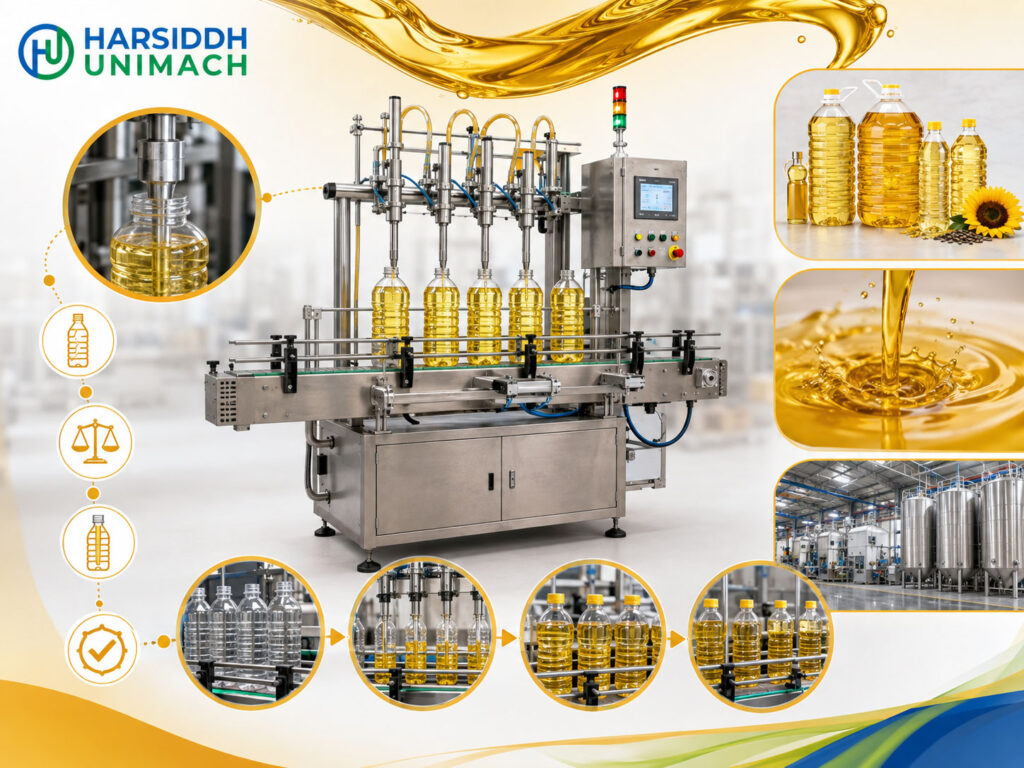
Sunflower, groundnut, mustard, soybean, rice bran, palm, cottonseed, coconut, sesame and olive oil: cooking oils are used in almost every kitchen, and they are sold in an enormous range of packs. A small household bottle, a family-size jar, a refill pouch, a tin for restaurants and a large jerrycan for caterers may all come from the same factory.
Every one of those packs must contain the declared quantity, look clean on the shelf and be sealed securely so the oil does not leak or go rancid. A cooking oil filling machine is designed to fill oil accurately and cleanly at production speeds across all these pack sizes.
In this article, we explain how cooking oil filling machines work: how oil behaves during filling, which dosing technologies are used, how different containers are filled, how drips and stringing are controlled, and how the filler fits into a complete oil packing line. For bulk and broader edible oil applications, see our edible oil filling machine working principle.
How Cooking Oil Behaves During Filling
| Property | Effect on Filling |
|---|---|
| Moderate viscosity | Thicker than water; flows steadily but slowly through small nozzles |
| Temperature dependence | Viscosity changes with temperature; some oils thicken or cloud when cold |
| Slipperiness | Oil on bottle necks causes caps to slip and labels to fail |
| Stringing | Oil can form thin strings at the nozzle at cut-off |
| Oxidation sensitivity | Exposure to air, light and heat can affect quality over time |
| Low foaming | Most cooking oils foam little, but splashing should still be avoided |
Oils that need special attention
- Palm oil and some blends can partially solidify at cooler temperatures. They may need warmed tanks and lines to stay fluid.
- Coconut oil solidifies at relatively mild temperatures and is often filled warm.
- Mustard oil has a strong aroma; tanks and machines should be cleaned thoroughly before switching to milder oils.
The Core Working Principle
Most cooking oil fillers use one of three principles:
1. Piston (volumetric) filling
A piston draws a set volume of oil from the supply tank into a cylinder and pushes it out through the nozzle. Fill volume is set by the piston stroke. Piston fillers are accurate and well suited to small and medium bottles.
2. Servo gear pump filling
A gear pump, driven by a servo motor, delivers oil continuously. Fill volume is set by the number of pump revolutions. Gear pumps handle oils particularly well, because the oil lubricates the gears, and volumes can be changed quickly on the control panel. This makes them popular for lines that run many pack sizes.
3. Weight (gravimetric) filling
The container sits on a load cell while oil flows in. Filling stops when the target weight is reached, often with a fast fill followed by a slow top-up. Weight filling compensates automatically for temperature and density changes and is common for larger containers such as tins and jerrycans.
For a detailed comparison, read weight-based vs volumetric filling: which technology is right for your product.
| Technology | Dose Controlled By | Best For |
|---|---|---|
| Piston | Stroke volume | Small and medium bottles, high accuracy |
| Servo gear pump | Revolutions | Many pack sizes, quick changeovers |
| Weight filling | Measured weight | Tins, jerrycans, large containers |
Main Components of a Cooking Oil Filling Machine
- Supply tank – stores oil above or beside the filler, with level control; may be heated for oils that thicken.
- Dosing pumps – pistons or servo gear pumps, one per head.
- Valves and manifolds – distribute oil to the nozzles.
- Filling nozzles – often diving nozzles with anti-drip shut-off.
- Conveyor – carries containers through the machine.
- Gates or indexing system – positions containers under the nozzles.
- Load cells (for weight fillers) – weigh each container during filling.
- Drip tray – catches drops between fills.
- Control panel – sets volume or weight, speed and recipes.
Step-by-Step Filling Process
Step 1: Container feeding
Empty bottles are oriented by a bottle unscrambler and placed on the conveyor. Larger containers such as tins and jerrycans are usually loaded manually or by a dedicated feeder.
Step 2: Positioning
Gates hold a group of containers under the nozzles. Sensors confirm each position is occupied, so no oil is dispensed without a container.
Step 3: Nozzle entry
Nozzles descend into the containers. For narrow-neck bottles, nozzles enter the neck to avoid oil running down the outside.
Step 4: Filling
The pumps deliver the dose. Fill speed is often higher in the middle of the fill and slower at the start and end to avoid splashing and to give a clean finish.
Step 5: Cut-off and drip control
Oil tends to string and drip. Anti-drip nozzles with positive shut-off, a short suck-back and drip trays keep necks and containers clean. This is critical for oil, because even a thin film makes caps slip and labels peel.
Step 6: Release
Filled containers move to capping.
Filling Different Cooking Oil Packs
PET bottles
The most common household pack. Piston or servo gear pump fillers with diving nozzles fill bottles quickly and cleanly. Bottles are then capped and labelled.
Jars
Wide-mouth jars, used for some oils and ghee blends, allow larger nozzles and faster filling.
Spout pouches
Refill pouches with a spout and cap are a lighter alternative to bottles. Pouches are held by the spout and filled through it. See the spout pouch filling machine.
Tins
Tins are common for restaurants and bulk buyers. Weight filling is popular for accuracy across large volumes, followed by cap or lid application.
Jerrycans
Large plastic jerrycans for caterers and institutions are usually weight-filled, with robust handling for heavy containers.
Cooking Oil Filling Machines from Harsiddh
- Automatic Cooking Oil Filling Machine
- Automatic Edible Oil Filling Machine
- Automatic Mustard Oil Filling Machine
- Automatic Palm Oil Filling Machine
- Automatic Servo Based Oil Filling Machine
- Servo based oil and viscous filling machine
- Servo based gear pump filling machine
- Servo based piston filling machine
- Liquid bottle filling and capping machine (monoblock)
Browse all our liquid filling machines. For thicker oils and other viscous products, read our high viscous liquid filling machine working principle.
The Complete Cooking Oil Packing Line
- Bottle unscrambler – orients and feeds bottles
- Bottle air cleaning (optional)
- Oil filling – piston, gear pump or weight filler
- Capping – screw caps or flip-top caps, for example on a bottle screw and ROPP capping machine
- Induction sealing – a foil seal under the cap prevents leaks and provides tamper evidence; see the induction sealing machine
- Labelling – on a bottle sticker labeling machine
- Batch coding
- Shrink wrapping or cartoning
Keeping Oil Quality High During Filling
- Limit air exposure – closed tanks and short product paths reduce oxidation.
- Control temperature – avoid overheating oils that are warmed to keep them fluid.
- Protect from light – where products are sensitive, store bulk oil and finished packs away from direct light.
- Keep it clean – food-grade contact parts, regular cleaning and prevention of cross-contamination between oil types.
- Fill and seal promptly – reduce the time oil spends in open containers.
Declared Quantity
Cooking oils may be sold by volume or by weight, depending on local rules and the market. If the pack declares volume but checks are done by weight, the oil’s density at the filling temperature is used to convert between the two. Because density changes with temperature, the conversion should use a density value appropriate to the actual filling conditions. Always follow the packaging and labelling regulations that apply in your market.
Changeover Between Oils and Pack Sizes
Many oil packers run several oil types and pack sizes on the same line. Efficient changeovers involve:
- Draining and recovering oil from the tank and lines to reduce waste
- Flushing or cleaning the product path, especially when switching from strong-smelling oils such as mustard to milder oils
- Changing nozzles and guides for the new container
- Setting the new fill volume or weight, or recalling a stored recipe on servo machines
- Adjusting conveyor gates and nozzle height
- Running test containers and checking fill accuracy before production
Servo gear pump machines are particularly convenient here, because fill volume is changed on the control panel without mechanical adjustment.
Cooking Oil vs Other Oils
| Oil Type | Typical Containers | Special Considerations |
|---|---|---|
| Cooking oils | Bottles, pouches, jars, tins, jerrycans | Food-grade design, drip control, temperature for palm and coconut oil |
| Hair oils | Small bottles | Small volumes, accurate dosing, attractive appearance |
| Engine and gear oils | Bottles, cans | Higher viscosity, robust pumps, industrial environment |
| Lubricants | Cans, drums | Large volumes, weight filling common |
Key Settings and Their Effects
| Setting | What It Controls | Effect If Wrong |
|---|---|---|
| Fill volume, revolutions or target weight | Dose per container | Under- or overfilling |
| Fill speed profile | Flow into the container | Splashing, slow output |
| Nozzle position | Where oil enters | Oil running down the outside |
| Shut-off and suck-back | Clean cut-off | Drips, oily necks |
| Tank temperature (where used) | Oil viscosity | Fill variation, slow flow |
| Tank level | Steady supply | Air in pumps |
| Gate timing | Container positioning | Misaligned containers |
Troubleshooting Common Problems
| Problem | Likely Cause | Corrective Action |
|---|---|---|
| Oily bottle necks | Drips, stringing | Improve shut-off and suck-back, check nozzle alignment |
| Caps slipping or leaking | Oil on threads | Improve drip control, clean necks |
| Labels peeling | Oil on bottle surface | Improve drip control, keep containers dry |
| Fill variation through the day | Temperature changes | Stabilise oil temperature, use weight checks |
| Slow filling in cold weather | Increased viscosity | Warm oil within safe limits |
| Palm oil clouding or setting | Low temperature | Heated tanks and lines |
| Gear pump volume drift | Wear | Inspect and service pump |
Checking Fill Accuracy
Check fill weights from every head at start-up and at regular intervals during production, particularly when the room or oil temperature changes during the day. Record the results, watch the trend and adjust individual heads before fills drift outside limits. On weight fillers, verify the load cells regularly with certified test weights so every container is filled against an accurate reference.
Maintenance Tips
- Inspect seals, O-rings and gear pumps regularly.
- Clean tanks, lines and nozzles thoroughly, especially when changing oil types.
- Check load cells on weight fillers and calibrate on schedule.
- Keep drip trays clean.
- Verify fill accuracy at start-up and at regular intervals.
How to Choose a Cooking Oil Filling Machine
- Oil types – including those that thicken or solidify when cool
- Pack types and sizes – bottles, jars, pouches, tins, jerrycans
- Dosing technology – piston, servo gear pump or weight
- Output and number of heads
- Changeover frequency between pack sizes
- Drip control and cleanliness features
- Downstream integration – capping, sealing, labelling, coding
- Food-grade construction and cleanability
Frequently Asked Questions
What is the working principle of a cooking oil filling machine? It measures oil by volume (piston or gear pump) or by weight (load cell) and delivers it through anti-drip nozzles into each container, which then moves on to capping and sealing.
Which technology is best for cooking oil? Piston and servo gear pump fillers suit bottles and jars; weight fillers are often preferred for tins and jerrycans.
Why is drip control so important for oil? Oil on necks and bottle surfaces makes caps slip, causes leaks and stops labels sticking.
How is palm oil filled? Palm oil can thicken or solidify when cool, so warmed tanks and lines are often used to keep it fluid during filling.
Can one machine fill different pack sizes? Yes. Servo machines in particular can switch between pack sizes quickly using stored recipes and suitable change parts.
Planning a cooking oil packing line? Contact our team or send an inquiry with your oil types, pack sizes and output targets.