
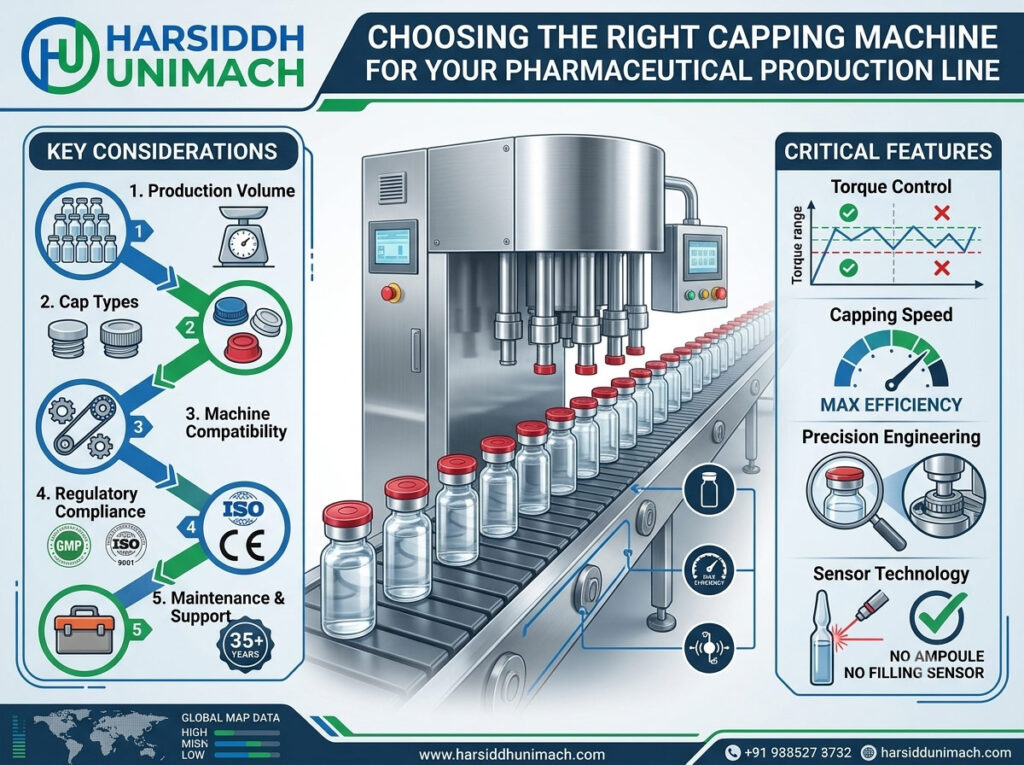
A pharmaceutical product is only as safe as its closure. The cap protects the product from contamination, moisture and leakage, shows whether the pack has been tampered with and, in many cases, keeps medicines out of children’s hands. The capping machine that applies that closure must do so consistently, at the speed of the line, for every container in every batch.
Choosing the right capping machine is therefore an important decision, but it is often made quickly, after the filling machine has already been selected. That can lead to problems: a capper that cannot keep up, cannot handle a particular cap, or produces inconsistent torque.
This guide sets out a step-by-step approach to choosing the right capping machine for your pharmaceutical production line: from identifying your closure and container to deciding on capping method, automation level, number of heads, torque control, integration and compliance features.
Once your capper is installed, our article on optimising production efficiency with advanced capping machines explains how to get the best performance from it.
Step 1: Identify Your Closure Type
The closure is the single most important factor in choosing a capping machine, because each closure type needs a different capping method.
| Closure Type | Common Pharmaceutical Use | How It Is Applied |
|---|---|---|
| Plastic screw cap | Oral liquids, tablets, powders | Rotated onto the thread to a set torque |
| Child-resistant screw cap | Oral liquids and solid doses where required | Rotated with torque suited to the mechanism |
| ROPP (roll-on pilfer-proof) cap | Syrups, oral liquids in glass or PET bottles | Aluminium shell formed onto the neck by rollers |
| Lug cap | Jars, some bottles | Partial turn onto lugs on the container finish |
| Vial crimp cap (flip-off or plain) | Injectable vials | Aluminium crimped over the stopper and neck |
| Snap-on cap or plug | Dropper bottles, some containers | Pressed onto the container |
| Dropper or pump closure | Eye, ear, nasal drops; sprays | Placed and screwed or pressed |
Collect samples of every closure you use or plan to use. Note the supplier, dimensions, materials and any liners or tamper bands.
Step 2: Understand Your Containers
The container determines how the capper holds and moves the product during capping.
Consider:
- Material: glass, PET, HDPE or other plastics. Glass needs careful handling to avoid breakage; lightweight plastic bottles may deform under top pressure.
- Shape: round bottles are easiest to handle; flat, oval or unusual shapes need special guides or grippers.
- Size range: the smallest and largest containers you will run.
- Neck finish: thread type and dimensions must match the cap.
- Stability: tall, narrow or light containers can tip on conveyors.
Share container drawings and samples with your supplier early. The capper’s change parts are made to suit them.
Step 3: Choose the Capping Method
With the closure and container defined, the capping method usually follows.
Screw Capping
Screw cappers rotate the cap onto the container thread until a set torque is reached. Methods include chuck-type heads, spindle wheels and pick-and-place systems. Our article on the bottle screw capping machine working principle explains how they work.
Pick-and-place screw capping lifts each cap from a feed track and places it precisely on the container before tightening, which is useful for caps that are hard to pre-place. An automatic four head pick and place type screw capping machine is one example.
Inline spindle capping tightens caps as containers pass between rotating spindle wheels, as on a linear capping machine. It is flexible and simple to change over.
ROPP Capping
ROPP cappers press an aluminium shell onto the bottle neck and use rollers to form the thread and the tamper-evident band. Roller settings must suit the cap and bottle. Options include a semi-automatic bottle ROPP capping machine or semi-automatic ROPP capping machine for smaller outputs, and automatic multi-head machines for production lines. A bottle screw and ROPP capping machine can be configured for either closure.
Lug Capping
Lug cappers apply caps with a partial turn, often with steam or vacuum options in food applications. In pharma, they are used for jars and some bottles. Read about the lug capping machine working principle, or see our lug capping machine. For jars with screw caps, an automatic jar capping machine is designed for wider containers.
Vial Cap Sealing
Injectable vials are sealed by crimping an aluminium cap over the rubber stopper. Machines range from single-head to multi-head versions, such as an automatic four head vial cap sealing machine or a vial cap sealing machine with 1, 4, 6 or 8 heads. Our comparison of eight head and single head vial cap sealing machines helps with the choice of head count.
Additional Sealing
Many bottles also need an induction-sealed foil liner for extra protection and tamper evidence. An induction sealing machine is placed after the capper. Our guide to choosing the right cap sealing solution compares sealing options.
Step 4: Decide on the Level of Automation
| Level | Description | Typical Output | Best For |
|---|---|---|---|
| Manual or hand-held | Operator applies and tightens caps with a tool | Very low | R&D, very small batches |
| Semi-automatic | Operator places containers (and sometimes caps); machine tightens or seals | Low to moderate | Small batches, pilot lines, many products |
| Automatic inline | Containers conveyed through; caps fed and applied automatically | Moderate | Small to medium production lines |
| Automatic rotary multi-head | Containers handled by star wheels; several heads cap in parallel | High | High-volume production |
| Monoblock | Filling and capping in one machine | Moderate to high | Space-saving integrated lines |
Semi-automatic machines are a cost-effective starting point for smaller operations. As volumes grow, automatic cappers linked to automatic fillers reduce labour and improve consistency. A liquid bottle filling and capping monoblock combines both functions in one compact machine.
Step 5: Size the Capper for Your Output
The capper must keep pace with the filler. As a general approach:
- Start with the filler’s realistic speed for your product and container.
- Choose a capper that can run somewhat faster than the filler, so it never becomes the bottleneck.
- Allow for future growth if you expect higher volumes.
Speed depends on the number of heads, cap type and container. ROPP and vial crimping often take longer per container than simple screw capping, so more heads may be needed for the same output. Ask suppliers for the expected speed with your specific caps and containers.
Step 6: Get Torque and Sealing Control Right
Closure quality depends on applying the right force consistently.
For Screw Caps
- Clutch-based torque control: magnetic or mechanical clutches slip at a set torque. Simple and reliable for many applications.
- Servo torque control: torque is set and monitored electronically, with values stored in recipes. Useful where many products and caps are run or where torque data is needed.
- Application and removal torque: confirm your specification for both, as removal torque matters for patients and child-resistant closures.
For ROPP Caps
- Roller pressure and position must be set correctly to form the thread and tamper band without damaging the bottle.
- Consistent cap shells and bottle necks are essential.
For Vial Crimp Caps
- Crimping force affects container closure integrity. Too little and the seal may leak; too much and the cap or vial may be damaged.
- Stopper position before crimping must be correct.
Whatever the method, plan for in-process checks, such as torque testing or crimp inspection, using calibrated equipment.
Step 7: Plan for Changeovers
If you run several products, caps or containers, changeover time can be as important as speed. Look for:
- tool-less or quick-release change parts
- clearly marked parts for each format
- easy height and width adjustment with scales
- recipe storage on servo machines
- simple cleaning of cap chutes, bowls and heads
Ask suppliers which parts change between your formats and how long a typical changeover takes.
Step 8: Integrate With the Rest of the Line
The capper works between the filler and the labeller. Check:
- Conveyor height and direction match the line layout
- Container spacing and stability at the infeed
- Speed matching with filler and labeller, with buffers where needed
- Linked controls so machines start, stop and slow together
- Downstream equipment, such as an induction sealer and labeling machines for round bottles, can handle the capped containers
Step 9: Check Compliance and Quality Features
Capping is a GMP-relevant step. Look for:
- Hygienic design: open frames, smooth surfaces, easy cleaning
- Suitable materials for parts in contact with caps and containers
- Missing cap detection and automatic rejection where required
- Guarding and interlocks for operator safety
- Documentation: manuals, drawings, material certificates and qualification support
Step 10: Evaluate the Supplier
Ask potential suppliers:
- Have you supplied cappers for my closure and container types?
- Can you test with my caps and containers before or during the FAT?
- What speed and torque consistency can I expect with my components?
- Which change parts are needed for each format?
- What documentation and qualification support do you provide?
- What spare parts should I keep, and how quickly can you supply them?
- Do you offer installation, training and service?
Matching Capping Machines to Common Pharmaceutical Products
| Product and Pack | Typical Closure | Suitable Capping Approach |
|---|---|---|
| Cough syrup in amber glass bottle | ROPP cap | ROPP capper, semi-automatic or automatic multi-head |
| Oral suspension in PET bottle | Plastic screw cap, often with induction liner | Screw capper followed by induction sealer |
| Dry syrup powder in bottle | Screw or ROPP cap | Screw or ROPP capper linked to the powder filler |
| Ointment or cream in jar | Screw or lug cap | Jar capper or lug capper |
| Eye drops in dropper bottle | Nozzle plug and screw cap | Integrated plugging and capping |
| Injectable in glass vial | Aluminium flip-off crimp cap | Vial cap sealing machine |
This table shows typical pairings only. Your choice should be based on your actual closures, containers and output.
Capping Machine Selection Checklist
| Question | Your Answer |
|---|---|
| Closure types (screw, ROPP, lug, crimp, other) | |
| Container types, materials and sizes | |
| Required output (containers per minute) | |
| Filler speed | |
| Level of automation | |
| Number of heads | |
| Torque or crimp control method | |
| Additional sealing (induction) needed? | |
| Number of formats and changeovers per week | |
| Integration with filler and labeller | |
| Compliance and documentation needs | |
| Budget |
Common Mistakes When Choosing a Capping Machine
- Choosing the capper after the filler without checking speeds. The capper becomes the bottleneck.
- Not testing with actual caps and containers. Small differences in caps or necks cause big problems.
- Ignoring future formats. A capper that cannot handle a new cap may need replacing.
- Underestimating changeovers. Many formats need quick, simple change parts.
- Overlooking torque specifications. Both application and removal torque matter.
- Forgetting downstream steps. Induction sealing and labelling must match the capper output.
Frequently Asked Questions
What is the difference between screw capping and ROPP capping? Screw capping applies a pre-threaded cap to a set torque. ROPP capping forms an aluminium shell onto the bottle neck with rollers, creating the thread and a tamper-evident band.
How many capping heads do I need? Enough for the capper to run somewhat faster than your filler with your caps and containers. Your supplier can calculate this based on cycle time.
Should I choose semi-automatic or automatic? Semi-automatic suits small batches and many products; automatic suits production lines linked to automatic fillers.
Can one capper handle several cap sizes? Yes, usually with change parts for each cap and container combination within the machine’s range.
Do I need induction sealing as well as capping? It depends on your product and market requirements. Induction sealing adds a hermetic, tamper-evident seal under the cap.
Find the Right Capping Machine With Harsiddh
Harsiddh Unimach manufactures screw, pick-and-place, ROPP, lug and jar capping machines, vial cap sealing machines, induction sealers and filling-capping monoblocks, in semi-automatic and automatic versions. Browse our full range of capping machines, or share your caps, containers and output requirements with our team for a recommendation.
Contact us through our contact page or send your requirements via our inquiry form.