
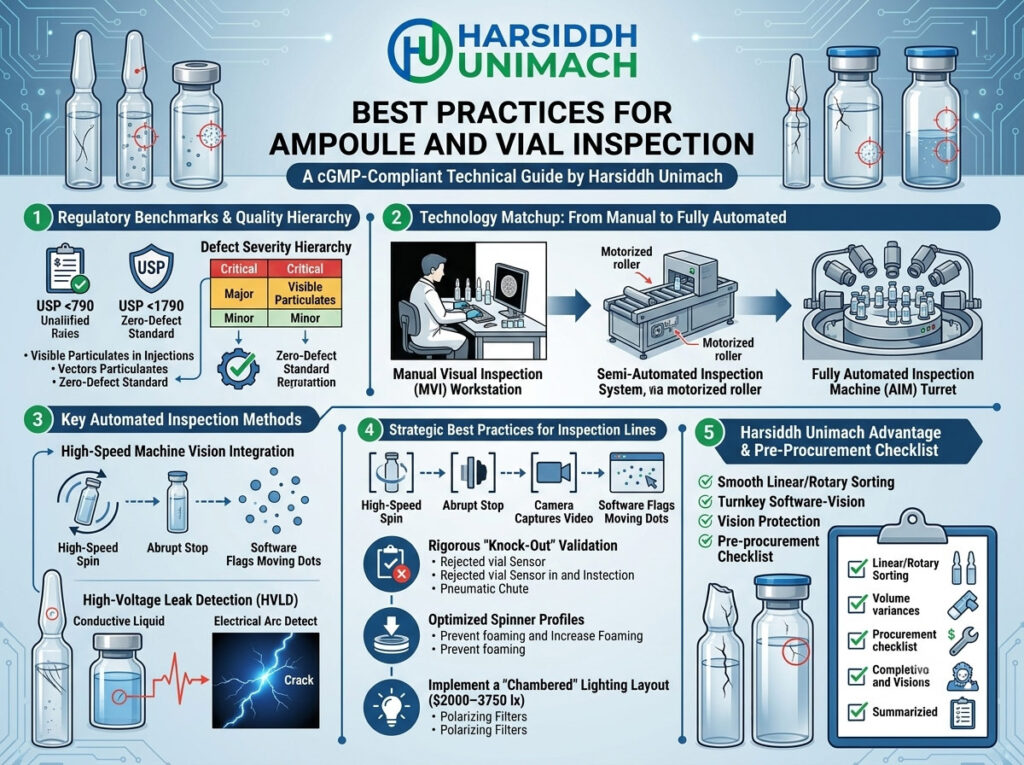
Every injectable product that leaves a pharmaceutical plant carries an implicit promise: the container is intact, correctly filled and free from visible particles. Keeping that promise depends on one of the most important — and most underestimated — steps in sterile manufacturing: inspection.
Inspection is the final opportunity to catch defects before products reach hospitals and patients. A glass fragment in a vial, a cracked ampoule or a missing stopper can lead to patient harm, product recalls and regulatory action. Regulators therefore expect parenteral products to be subjected to 100% inspection, carried out under controlled conditions by qualified people or validated equipment.
In this guide, we share practical best practices for ampoule and vial inspection — from understanding defects and setting up inspection conditions to qualifying inspectors, choosing equipment and using inspection data to improve the whole process.
Why Inspection Matters So Much
Injectable products bypass the body’s natural defences, so contamination carries direct risk. Visible particles can block blood vessels or trigger immune reactions, while damaged containers can compromise sterility. Pharmacopoeial standards require injections to be essentially free from visible particulates, and GMP guidelines such as EU GMP Annex 1 require every filled container of a parenteral product to be inspected.
Beyond compliance, inspection protects your brand. Customers, distributors and auditors judge product quality by what they see — and a single visible defect can damage trust built over years.
Understanding Defects: What Are You Looking For?
A good inspection programme begins with a clear understanding of the defects that can occur. Defects are usually classified by their risk to the patient:
- Critical defects could harm the patient or compromise sterility — for example, cracks, missing or improperly sealed closures, foreign particles and glass fragments.
- Major defects may affect product performance or usability — for example, incorrect fill volume, deformed stoppers or poor crimping.
- Minor defects are cosmetic and don’t affect safety or function — for example, small scratches or slight label misalignment.
Common ampoule defects
- Cracks in the body or neck
- Incomplete seals, fine capillaries or open tips
- Burnt or charred tips and carbon particles from sealing
- Bulbs, bubbles or deformed tips
- Glass particles from washing or sealing
- Incorrect fill volume
- Foreign particles such as fibres, rubber or metal
Many ampoule defects originate during sealing, so inspection results should be fed back to the filling and sealing machine. For high-output lines like the eight head ampoule filling and sealing machine, consistent burner settings and correct pull sealing are the best way to prevent seal defects.
Common vial defects
- Cracks, chips and stress marks in the glass
- Missing, raised or tilted stoppers
- Loose, wrinkled or poorly crimped seals
- Missing flip-off caps
- Incorrect fill volume
- Visible particles, fibres or glass fragments
- Discoloration or cloudiness of the solution
- For powders and lyophilised products: incorrect cake appearance, collapsed cake, foreign matter or melt-back
Crimping problems are a frequent source of vial defects. Learn more in our article on how crimping force affects container closure integrity, and see our 1, 4, 6 and 8 head vial cap sealing machines.
Best Practice 1: Build a Defect Library
Create a library of real defect samples — and photographs — representing every defect type your products can have. Each defect should be described, classified and illustrated. The library is used to:
- Train new inspectors
- Prepare qualification test sets
- Set up and challenge automatic inspection machines
- Standardise decisions across shifts and sites
Update the library whenever a new defect type is found in production or reported by a customer.
Best Practice 2: Control the Inspection Environment
Manual and semi-automatic inspection depends on human eyesight, which is strongly affected by conditions. Standardise:
- Lighting: use controlled, uniform illumination at the intensity specified in your procedures, in line with pharmacopoeial guidance. Check light intensity regularly with a calibrated lux meter.
- Backgrounds: inspect each container against both a black background (to reveal light-coloured particles, glass and fibres) and a white background (to reveal dark particles and discoloration).
- Glare control: non-reflective surfaces and correct light positioning prevent reflections that hide defects.
- Ergonomics: comfortable seating, correct viewing height and a quiet, distraction-free area keep inspectors focused.
- Magnification: some inspection stations use a magnifying lens to help detect fine particles.
A purpose-built bottle visual inspection table or inspection tables and conveyors provide the right lighting and background for consistent results.
Best Practice 3: Use the Right Inspection Technique
How containers are handled during inspection affects detection:
- Swirl or invert gently to set particles in motion. Moving particles are far easier to see than stationary ones — but avoid creating air bubbles, which can be mistaken for particles.
- Inspect for a defined time against each background, as set out in your procedures and the applicable pharmacopoeia. Rushing reduces detection rates.
- Inspect a controlled number of containers at a time to prevent missed defects.
- Check all areas — body, base, shoulder, neck, closure and seal.
Semi-automatic inspection machines help enforce consistent technique by rotating containers at a controlled speed in front of the inspector, then stopping them suddenly so the liquid keeps moving while the container stands still — making particles highly visible. See the Semi-Automatic Visual Ampoule Inspection Machine, the Semi-Automatic Visual Vial Inspection Machine and our visual ampoule and vial inspection machine.
Best Practice 4: Qualify and Requalify Inspectors
Human inspection is only as good as the people doing it. A robust qualification programme includes:
- Eyesight testing: near-vision acuity and colour vision checks at regular intervals.
- Training: classroom training on defect types and procedures, followed by supervised practice.
- Qualification with test sets: inspectors inspect a blinded set of containers containing known defects and good units. They must meet defined detection rates for critical defects and low false-reject rates.
- Periodic requalification: typically annually, or after extended absence or poor performance.
- Performance monitoring: comparing individual results to identify trends or retraining needs.
Best Practice 5: Manage Fatigue
Visual inspection is mentally demanding. Detection rates fall as concentration drops, so:
- Limit continuous inspection sessions and schedule regular breaks.
- Rotate inspectors between inspection and other tasks.
- Avoid scheduling inspection at the end of long shifts where possible.
- Monitor reject rates during the shift to identify fatigue-related drops.
Best Practice 6: Choose the Right Level of Automation
Inspection can be manual, semi-automatic or fully automatic. Each has a role:
| Method | How It Works | Best For |
|---|---|---|
| Manual | Inspector handles containers in a booth | Small batches, R&D, clinical supplies |
| Semi-automatic | Machine conveys and spins containers; inspector decides | Small to medium production, consistent technique |
| Automatic (AVI) | Cameras and sensors inspect and reject automatically | High-volume production, objective and documented results |
Semi-automatic inspection is a cost-effective step up from manual inspection, combining machine consistency with human judgement.
Automatic visual inspection (AVI) systems use high-resolution cameras and image processing to inspect every container at line speed. They deliver objective, repeatable and documented decisions, though they must be validated against the manual inspection baseline using defect test sets.
Powders and lyophilised products need special attention, since particles cannot be set in motion by swirling. Dedicated machines such as the Automatic Visual Vial Dry Powder Inspection Machine and our visual vial dry powder inspection machine are designed for this application.
Explore all options in our inspection machines category and the inspection machines on Harsiddh Engineering.
Best Practice 7: Include Container Closure Integrity Testing
Visual inspection cannot detect every leak. Fine capillaries in ampoule seals or micro-leaks at vial stoppers may be invisible to the eye. Many manufacturers therefore add container closure integrity (CCI) or leak testing:
- Dye ingress testing: ampoules are immersed in a coloured dye solution under vacuum; any leaking ampoule draws in dye and is visibly rejected. This is common for ampoules.
- Vacuum decay and pressure decay: non-destructive methods that detect leaks through pressure changes.
- High-voltage leak detection: detects leaks in liquid-filled containers using electrical conductivity.
The right method depends on container type, product and regulatory expectations.
Best Practice 8: Add AQL Sampling After 100% Inspection
After 100% inspection, a statistically based Acceptable Quality Limit (AQL) sample is taken from the accepted containers and re-inspected by experienced personnel. This confirms that the 100% inspection was effective. If the AQL sample fails, the batch is typically re-inspected and an investigation is opened.
Best Practice 9: Trend and Investigate Inspection Data
Inspection data is valuable quality intelligence. Record rejects by defect type, batch, line and shift, then trend them over time. Investigate:
- Rejects that exceed alert or action limits
- New or unusual defect types
- Sudden increases in particular defects
Often, the root cause lies upstream — in washing, depyrogenation, filling, sealing or capping. For example, a rise in glass particles may point to vial breakage on the line; read our article on the top 5 causes of vial breakage on high-speed filling lines. Monitoring the right process points, as described in vial filling machine inspection points, helps prevent defects before they reach final inspection.
Best Practice 10: Prevent Defects at the Source
The best inspection result is a batch with almost nothing to reject. Prevention starts with:
- Effective washing: well-maintained ampoule washing machines and vial washing machines remove particles before filling.
- Clean component handling: stoppers, seals and containers must be stored and transferred without contamination.
- Accurate filling and sealing: precise dosing, drip-free nozzles and consistent sealing reduce defects.
- Gentle glass handling: smooth transfers and correct change parts minimise scratches and breakage.
- Good GMP equipment design: read more about the importance of GMP compliance in pharmaceutical machinery.
Best Practice 11: Write Clear Procedures and Keep Good Records
Consistent inspection requires clear, detailed standard operating procedures. A good inspection SOP defines:
- The inspection method, timing and sequence for each container type
- Lighting levels, backgrounds and how they are verified
- Defect definitions and classifications, with reference to the defect library
- How rejects are segregated, counted and reconciled against batch quantities
- Alert and action limits for reject rates, and what to do when they are exceeded
- How machine settings are verified at the start of each batch
Batch records should capture the number of containers inspected, accepted and rejected by defect category, the inspectors involved and the AQL result. Complete, accurate records make investigations faster and audits smoother.
Common Inspection Mistakes to Avoid
- Treating inspection as a sorting step only, instead of a source of process feedback.
- Relying on a single background or inconsistent lighting.
- Skipping requalification because inspectors are experienced.
- Ignoring false rejects, which waste good product and can hide poor inspection technique.
After Inspection: Labelling and Release
Once containers pass inspection, they move on to labelling and packing. Accurate labelling — using equipment such as our labeling machines for vials — ensures that only inspected, approved products are identified and released. Rejected containers must be segregated, reconciled and disposed of under controlled procedures.
Frequently Asked Questions
Is 100% inspection required for injectable products? Yes. GMP guidelines require every filled container of a parenteral product to be inspected for defects, followed in many cases by AQL sampling.
Why are black and white backgrounds used? A black background reveals light-coloured particles and glass, while a white background reveals dark particles and discoloration. Using both increases detection.
What is the difference between semi-automatic and automatic inspection? Semi-automatic machines convey and spin containers while an inspector makes the decision. Automatic machines use cameras to inspect and reject containers without human judgement.
Can visual inspection detect all leaks? No. Fine leaks may be invisible, so container closure integrity tests such as dye ingress or vacuum decay are often used in addition.
How often should inspectors be requalified? Typically at least once a year, and also after long absences, performance issues or significant procedure changes.
Want to improve your ampoule and vial inspection? Contact our team or send an inquiry to discuss your requirements.