
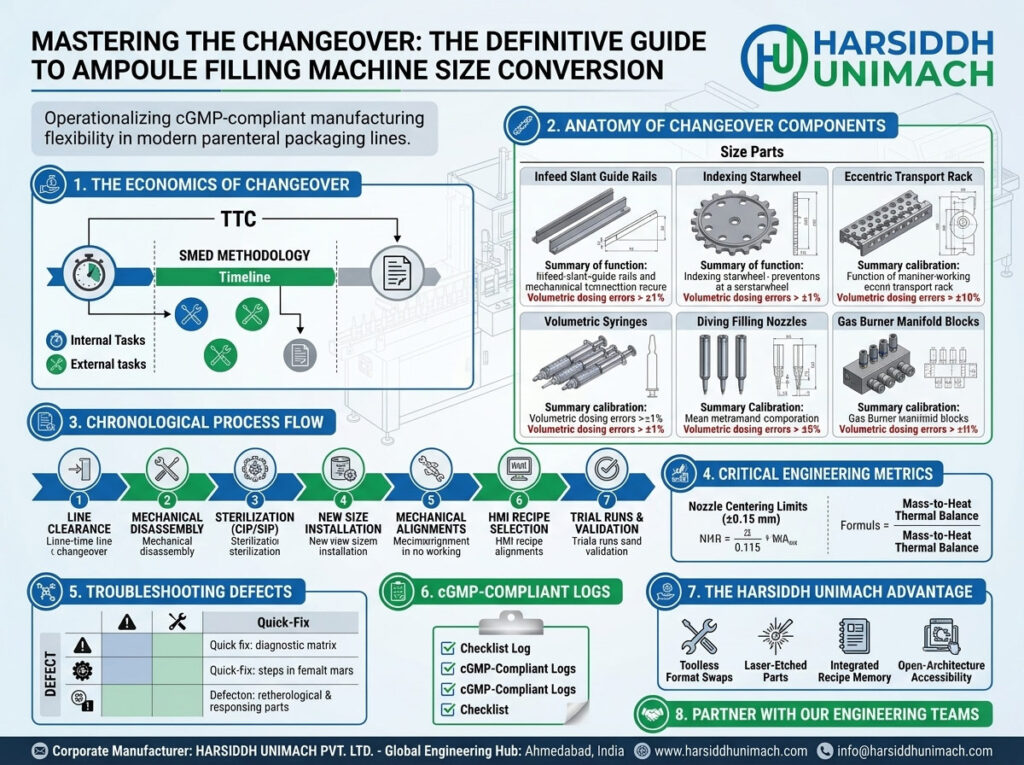
Most ampoule filling and sealing machines are expected to run more than one ampoule size. A single machine may fill 1 ml, 2 ml, 5 ml and 10 ml ampoules for different products — and every switch between sizes requires a size conversion. Done well, conversion is quick, repeatable and leads straight into consistent production. Done poorly, it causes broken ampoules, poor seals, fill variation and hours of lost time.
This guide explains exactly what changes when an ampoule machine is converted from one size to another, how to plan and carry out the conversion step by step, which settings must be adjusted for each size, how to verify the result and how to build a conversion system that is fast, safe and right first time. For specific techniques to shorten changeover time, see our companion article on how to reduce downtime between different ampoule sizes.
Why Size Conversion Matters
Each ampoule size has a different diameter, height, neck geometry and fill volume. The machine must hold, move, fill and seal each one precisely. If any part or setting is wrong:
- Ampoules tilt, jam or break in the transport system
- Needles miss the neck or touch the glass
- Fill volumes are wrong or inconsistent
- Flames heat the wrong part of the neck
- Seals are weak, long, bulged or leaking
Because these problems directly affect product quality and sterility, size conversion is a controlled, documented activity in GMP manufacturing — not just a mechanical task.
What Changes During a Size Conversion?
1. Infeed parts
- Infeed hopper or table guides – adjusted or replaced to suit ampoule diameter and height
- Infeed rails and separators – ensure ampoules feed smoothly into the transport system
2. Transport (walking beam) plates
The serrated V-groove plates that carry ampoules are size-specific. Groove pitch and depth must match the ampoule diameter so ampoules sit upright and evenly spaced. These are usually the most important change parts.
3. Needle assemblies
- Filling needles – length and diameter matched to the ampoule neck and height
- Gassing needles – positioned for the new ampoule height
- Needle carriage height – adjusted so needles reach the correct depth
4. Dosing settings
- Fill volume – pump stroke set for the new volume (mechanically or via HMI on servo machines)
- Fill speed and suck-back – adjusted for the new volume and neck size
5. Sealing station
- Burner height and position – aligned to the neck constriction of the new ampoule
- Flame settings – gas and oxygen flows adjusted for neck diameter and wall thickness
- Rotation rollers – adjusted or changed for the new diameter
- Pull-sealing tongs – height and grip adjusted to the new tip position
6. Outfeed parts
- Outfeed guides and tray settings – suited to the new ampoule size
7. Closed ampoule machines
For closed ampoules, the tip-opening station — heating, cutting and suction — must also be adjusted to the new tip height.
Planning the Conversion
Good conversions start before the machine stops.
Production scheduling
Group products by ampoule size to reduce the number of conversions. Where possible, run smaller to larger sizes or follow a sequence that minimises adjustments.
Change part preparation
- Keep a complete, clearly labelled set of change parts for each size
- Store parts on dedicated trolleys or racks, organised by size
- Inspect parts for wear or damage before the conversion begins
Tools and documents
- Prepare the correct tools — ideally a minimal, standardised set
- Have the conversion SOP and size-specific settings sheet ready
- Prepare cleaned and sterilised product-contact parts for the new batch
People
- Assign trained operators and, if needed, a maintenance technician
- Define who does what, so tasks can run in parallel
What Changes When You Convert to a New Ampoule Size
Step-by-Step Size Conversion Procedure
Step 1: End the previous batch
Complete production, stop the machine safely and close out batch documentation, including final counts and reject reconciliation.
Step 2: Clear the machine
Remove all ampoules from the infeed, transport and outfeed. Collect and reconcile rejects and remaining materials as required by your line clearance procedure.
Step 3: Shut off utilities safely
Extinguish burners, close gas and oxygen supplies, stop nitrogen flow and isolate the product supply. Follow lockout procedures before working inside guards.
Step 4: Remove product-contact parts
Remove pumps, tubing and needles for cleaning and sterilisation, or exchange them for prepared sets.
Step 5: Clean the machine
Remove glass fragments, residue and dust from transport plates, guides, sealing area and outfeed. Glass fragments left on the machine are a common cause of breakage and particles in the next batch.
Step 6: Change the transport plates
Remove the old serrated plates and install the plates for the new size. Check alignment between fixed and moving plates carefully — misalignment is the most common cause of breakage after conversion.
Step 7: Adjust infeed and outfeed guides
Fit or adjust guides to the new ampoule diameter and height. Check that ampoules can roll freely without excessive play.
Step 8: Install needles and set height
Fit the correct filling and gassing needles. Adjust the needle carriage height so needles enter the neck centrally and reach the correct depth without touching the glass.
Step 9: Set dosing parameters
Set the fill volume for each pump. On servo machines, select the recipe for the new size; on mechanical machines, adjust pump strokes. Prime the product path to remove air.
Step 10: Adjust the sealing station
- Set burner height to the neck constriction of the new ampoule
- Adjust roller position or fit rollers for the new diameter
- Set tong height and timing for the new tip position
Step 11: Restore utilities and light burners
Reopen gas, oxygen and nitrogen supplies, light the burners and adjust flame size and gas ratio for the new neck.
Step 12: Trial run
Run a small number of ampoules at reduced speed. Inspect each position for:
- Smooth transport without tilting or breakage
- Correct needle entry and dry necks
- Accurate fill volume (weigh samples from every head)
- Uniform, smooth seals without capillaries, bulbs or charring
- Correct tip length
Step 13: Fine-tune and verify
Make small adjustments as needed and repeat trials until all positions meet specification. Record final settings.
Step 14: Line clearance and release
Complete documentation, obtain line clearance and quality approval, then begin production at normal speed.
Size-Specific Settings Sheet
For every ampoule size, maintain a settings sheet that records:
| Item | Example Entries |
|---|---|
| Change part set | Transport plates, guides, needles, rollers (ID numbers) |
| Needle carriage height | Scale or encoder position |
| Fill volume | Target volume and pump setting |
| Fill speed / suck-back | Values or recipe name |
| Nitrogen flow | Pre- and post-gassing settings |
| Burner height | Scale position |
| Gas and oxygen flow | Flow meter readings |
| Roller and tong settings | Height and timing |
| Machine speed | Validated speed for this size |
Using recorded settings as a starting point turns every conversion into a repeatable process rather than trial and error.
How Servo Technology Simplifies Conversion
On servo-driven machines, many settings — fill volume, fill speed, suck-back, needle profile and sometimes timing — are stored in recipes and applied automatically when a size is selected. This reduces manual adjustment and makes results more consistent. Learn more in servo technology in modern ampoule filling machines.
Conversion Across Machine Sizes
The principles are the same across models, but the number of positions to set up grows with the number of heads:
- Four head machines – such as our four head ampoule filling and sealing machine
- Six head machines – such as the Automatic Six Head Ampoule Filling & Sealing Machine and our six head ampoule filling and sealing machine
- Eight head and high-speed machines – such as our eight head ampoule filling and sealing machine and the Automatic High-Speed Vertical Ampoule Filling and Sealing Machine, where verifying every position is especially important. See the eight head process flow guide for details.
- Closed ampoule machines – which also require tip-opening adjustments, such as the Automatic Four Head Closed Ampoule Filling and Sealing Machine and our six head closed ampoule filling and sealing machine
Browse our ampoule filling machines for open ampoules and ampoule filling machines for closed ampoules.
Don’t Forget the Rest of the Line
A size conversion affects the whole ampoule line, not just the filler:
- Washer: change parts and needle settings on the rotary ampoule washing machine
- Tunnel: belt guides and settings on the sterilizing tunnel for ampoules and vials may need adjustment for ampoule height
- Labeller: size parts and label settings on the rotary ampoule sticker labeling machine
Coordinating conversions across all machines avoids the situation where the filler is ready but the washer or labeller is not.
Documentation and GMP Control
In regulated manufacturing, size conversion must be traceable. A good conversion record captures:
- The previous and new ampoule sizes and products
- Change part set identification numbers
- Who performed and checked the conversion
- Key settings applied, or the recipe selected
- Trial results — fill weights per head and seal inspection outcome
- Line clearance confirmation and quality approval
- Any deviations or adjustments made during setup
Change parts themselves should be controlled items: identified, stored correctly, inspected periodically and replaced when worn. Recipes on servo machines should be protected by user access levels so that only authorised changes are made. This level of control means every conversion can be reviewed during audits and investigations, and it gives teams the data they need to spot recurring problems and keep improving conversion quality over time.
Common Conversion Mistakes
- Misaligned transport plates causing tilting and breakage
- Wrong needle length leading to needles touching liquid or glass
- Burners set for the previous size, heating the wrong part of the neck
- Skipping fill weight checks on every head after conversion
- Leaving glass fragments on the machine from the previous batch
- Using worn change parts that no longer hold ampoules accurately
- Not recording final settings, so the next conversion starts from scratch
Best Practices for Fast, Reliable Conversions
- Label and colour-code change parts by ampoule size.
- Store parts on dedicated trolleys near the machine.
- Use settings sheets or recipes for every size.
- Prepare everything in advance — parts, tools, documents and sterile components.
- Work in parallel where safe — for example, cleaning while preparing parts.
- Standardise tools and fixings to reduce time spent searching.
- Verify every position with trial ampoules before production.
- Inspect change parts regularly for wear as part of maintenance — see our ampoule filling machine maintenance checklist.
- Train and qualify operators on conversion procedures.
- Review and improve conversion times regularly.
Many of the same principles apply to vial lines — see vial filling machine changeover best practices.
Frequently Asked Questions
What is size conversion on an ampoule filling machine? It is the process of changing parts and settings so the machine can fill and seal a different ampoule size.
Which parts change during conversion? Typically transport plates, infeed and outfeed guides, needles, rollers and tong settings, along with fill volume and burner positions.
Why do ampoules break after conversion? The most common causes are misaligned transport plates, incorrect guide settings or worn change parts.
How can conversion time be reduced? By preparing parts in advance, using labelled change parts, standardised tools, recorded settings or servo recipes, and parallel working.
Do closed ampoule machines need extra conversion steps? Yes. The tip-opening station must also be adjusted for the new ampoule height.
Want an ampoule machine designed for quick, reliable size conversion? Explore our ampoule filling machine range, contact our team or send an inquiry.